Gemini Mirror from Hugo
Let's check out how to host a gemini capsule based on the content you have in hugo already!
For this little tutorial, we'll use the Hugo Getting Started guide and create a small blog with exactly one blog post and then start serving it over gemini://.
The markdwon to gemtext conversion and serving will be done through some GO packages, so remember to install go.
Setting up Hugo
Firstly we'll set up hugo, either through your package manager or through the GO toolchain. Open up a terminal and run the default tutorial instructions:
hugo new site quickstart
cd quickstart
git init
git submodule add https://github.com/theNewDynamic/gohugo-theme-ananke themes/ananke
echo "theme = 'ananke'" >> config.toml
hugo server
Now we also need some example content, so we'll add my-first-post.md to the content directory:
---
title: "My First Post"
date: 2022-11-20T09:03:20-08:00
---
## Introduction

This is **bold** text, and this is *emphasized* text.

Visit the [Hugo](https://gohugo.io) website!
now we should see the post show up at localhost:1313. So far so good!
Serving Gemini from Hugo Content
There are three related projects all by n0x1m that are going to enable us to serve gemfiles from the existing hugo content. What they did is to grab some hugo code from a few versions ago to generate an identical path tree and they also serve it over gemini, perfect, right?
With the go toolchain installed you can run:
go install github.com/n0x1m/hugoext@latest
go install github.com/n0x1m/md2gmi@latest
go install github.com/n0x1m/gmifs@latest
Now we can run:
hugoext -ext gmi -pipe md2gmi
and it will build the .gmi file output in the public directory \o/.
Next, to serve the content we can run:
gmifs -autoindex
and visit: gemini://localhost
What we should see in a gemini browser is this:
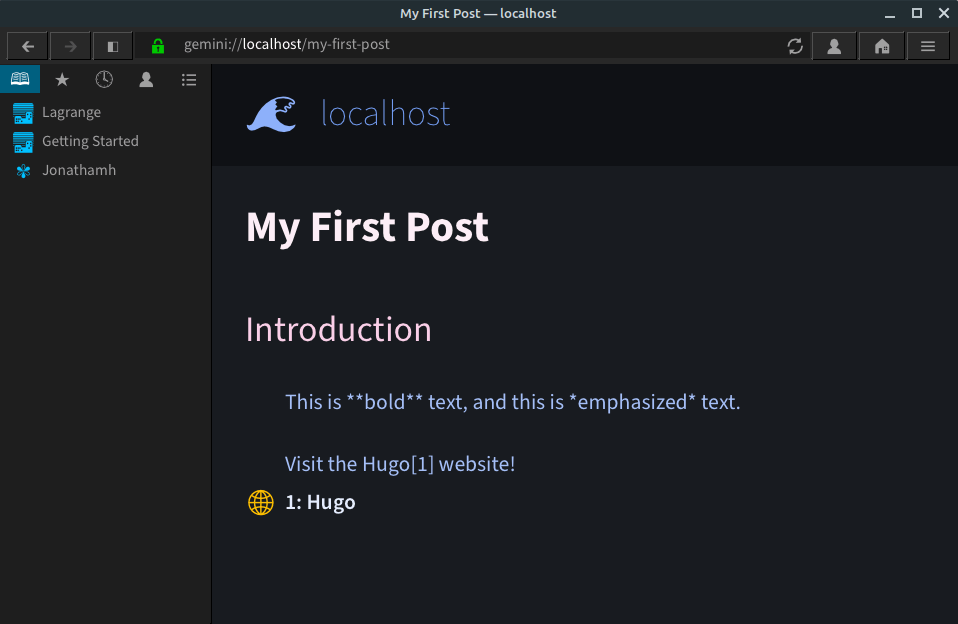
Brilliant, we can conclude it works!
Now we just need to deploy it somewhere and point a domain at it.
Deploying hugoext / gmifs with Docker
I'm used to Docker at this point and I don't have the nerve to learn 100 different hosting providers own config syntax, so we'll write a small Dockerfile.
One of the providers I've been wanting to try out is fly.io, but you can obviously deploy anywhere where Docker images are supported, like heroku, AWS, Azure or whatever you can think of.
FROM golang:1.19-alpine

# install GO dependencies
RUN go install github.com/n0x1m/hugoext@latest
RUN go install github.com/n0x1m/md2gmi@latest
RUN go install github.com/n0x1m/gmifs@latest

RUN mkdir -p /var/site
WORKDIR /var/site

COPY content /var/site

EXPOSE 1965

CMD ["gmifs", "-autoindex", "-autocertvalidity=666"]
In the CMD line we add "-autocertvalidity=666"
because by default our certificate the self-signed cert would only be valid for 1 day:
-autocertvalidity int
        valid days when using a gmifs provisioned certificate (default 1)
Now let's build it with docker build . -t hugo-gmi and run with:
docker run --init -p 1965:1965 -t hugo-gmi
which maps the exposed port to the same post on the host system. If you get an error, it's because you still have gmifs running on the same port in another terminal.
Accessing gemini://localhost should now again show you your website.
Deploying Docker Image to fly.io
If you want to use fly.io, head on over and create an account first, you'll need to punch in your credit card if you want to deploy.
You'll get some things for free, but be vary of excess bandwidth you might have to pay for:
Up to 3 shared-cpu-1x 256mb VMs 3GB persistent volume storage (total) 160GB outbound data transfer
First we need to install the [flyctl][flyctl], for me that is:
curl -L https://fly.io/install.sh | sh
Then you will want to authenticate your flyctl to your fly.io account, so you run:
flyctl auth login
which will open your browser and let you authenticate the request, after that you're logged in on your system.
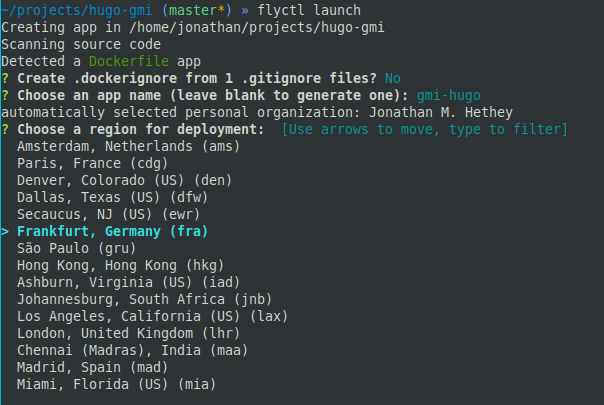
Next, to trigger the interactive dialogue for deployment, we run the following in our quickstart directory or where your gmi-hugo blog is located.
flytcl launch
We answer a few questions, but the defaults are pretty good. We need to answer with y when it comes to if we actually want to deploy.
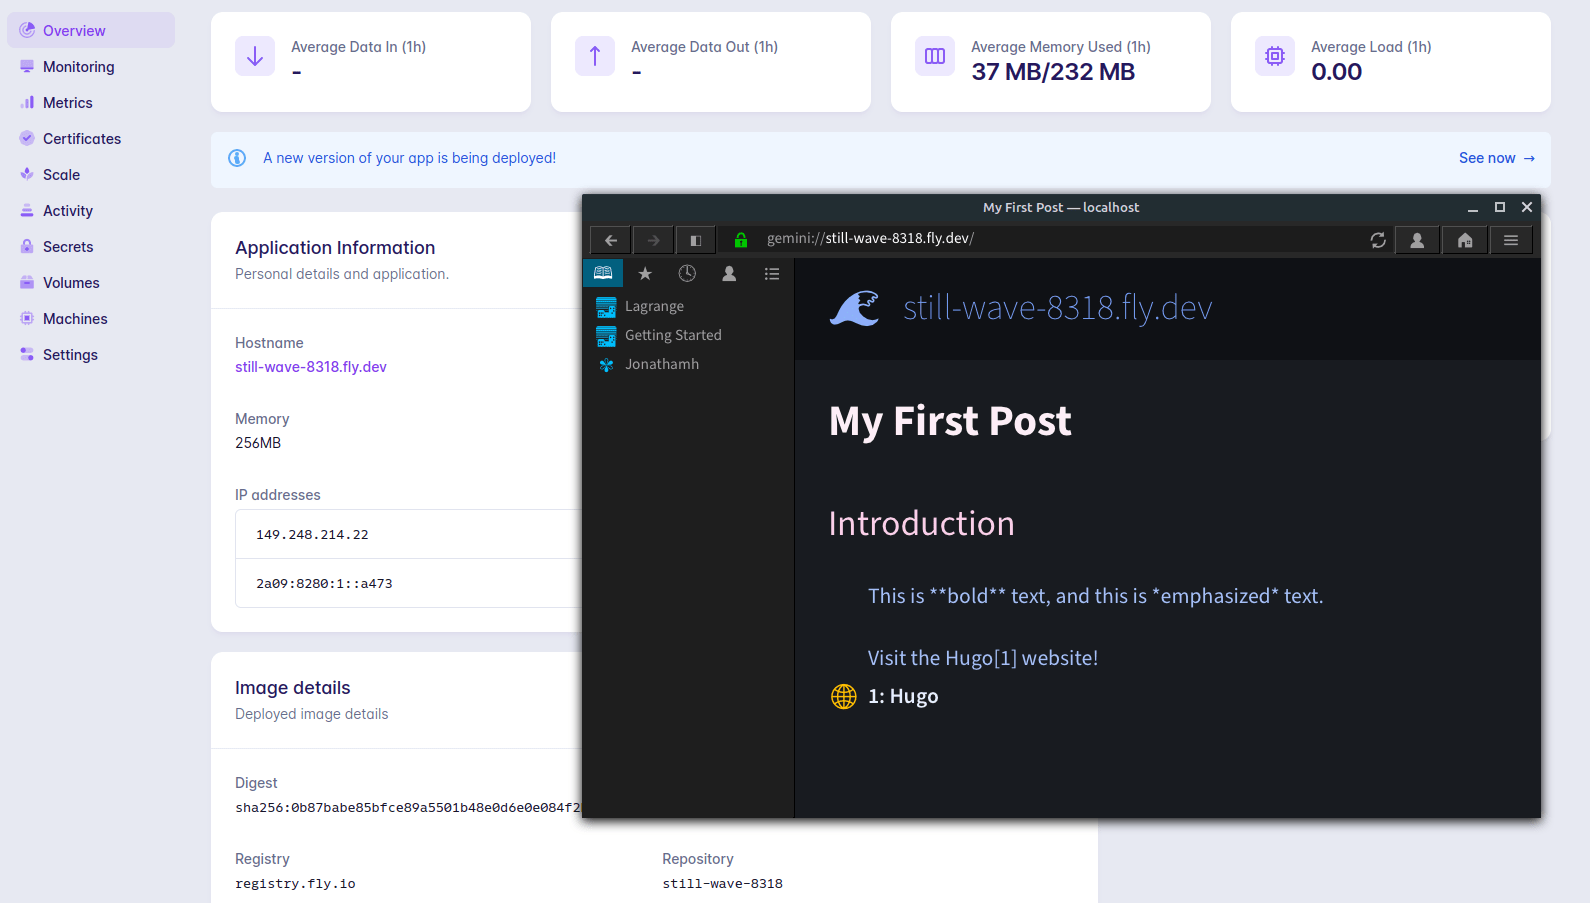
Now we can watch some terminal output of our image being built in production, after it's done we can go to our fly.io dashboard, find our app and access the random subdomain with our gemini browser!
Now you just need to grab your DNS settings and point gmi.yourdomain.com at this IP address or host to make sure you can be reached at the desired address!
Closing Thoughts
I got incredibly lucky finding the awesome projects thata are gmifs and hugoext because they were exactly my use case. Trying out fly.io was very pleasant and really perfect for tiny projects and niche blogs!
Your deploy process might vary, you might already have a Dockerfile and might just want to copy your content directory to a different project directory that will only have the dockerfile above to push to a separate remote.
For my own blog I had to use a slightly different approach to get my content in shape to be served through gemini://jonathanmh.com, because I don't personally use hugo.